
This birthday shaker card is for my mother…all the things she loves…shine, sparkle, gold, pink and made by me! It features the Dressed to Impress stamps and dies and the Celebration Labels dies. Enjoy!
The Paper Cuts
- Shimmer White Cardstock: a cardbase cut at 4 1/4″ x 11″ and scored at 5 1/2″, two of the 2nd smallest Celebration Labels die and scraps for the floral and sentiment.
- Plaid Tidings 6×6 Designer Series Paper: a 6×6 sheet cut at 4″ x 5 1/4″. You’ll use the remaining pieces for the envelope flap and the strip inside.
- Gold Foil Sheets: the middle sized Celebration Labels die.
- Window Sheet: the 2nd smallest Celebration Labels die.

The Creating
- Use the perfume bottle die to cut out the center of one of the Shimmer White labels. Lay the label on top of the other, place in the Stamparatus to line up the perfume stamp through the opening. Remove the label with the opening. Stamp the perfume bottle with Versamark Ink, sprinkle with Gold Stampin’ Emboss and melt with the Heat Tool. Repeat with the sentiment on the inside of the card, the rose image and the “hello fabulous”.
- Color the rose image with Stampin’ Blends.
- Fussy cut the “hello fabulous” with Paper Snips. Apply Foam Adhesive Strips to the top of the “h” and the “ll”s.
- Die cut the floral image with the coordinating die. Apply Stampin’ Dimensionals to the back.
- Use Multipurpose Liquid Adhesive to apply the Window Sheet to the back of the Shimmer White die cut of the perfume bottle. Apply Foam Adhesive Strips along the edges of the bottom portion of the bottle and around the rest of the label to support it.
- Adhere the plaid panel on the card front. Top with the Gold Foil label. Add the Shimmer White label with the embossed perfume bottle. Place your filler in the center of the perfume bottle. Top with the window sheet label.
- Add the floral image, the sentiment, the bow and the strip to the inside.
- Adhere the remaining plaid piece to the envelope flap and trim excess.

")


 Designer Series Paper")


")


")
Designer Series Paper Sale Ends October 31st

We all love gorgeous Designer Series Paper, and during this incredible sale, you can enjoy a 15% discount on select papers from our current catalogs! Now is a great time to stock up and save on some of our most popular paper designs! List, pictures and links below. For more information click here.
If you need any stamping supplies, I’d be very happy to be your Demonstrator. Just click on the links above or the shop image on on the right side of the screen to go directly to my online store or drop me an email me at stampdabbles@gmail.com. I’d love to hear from you.
Happy Stamp Dabbling!

- Visit my online store here.
- The current Host Code is QZXSZQH3.
- Shop the Clearance Rack here.
- Reserve a Paper Pumpkin Subscription here.
- New to Stamping? Check out the new Beginner’s Brochure here.
- Earn FREE Stampin’ Up! Products – See Customer Rewards here. It’s my way to say thank you!
- In addition to my online store, I also take PayPal payments for orders. See the bottom of the Customer Rewards page here for details.
August-December 2020 Mini Catalog

You will find many wonderful, beautiful, creative and fun ideas and products inside. You can check it out digitally HERE. If you do not already have a Demonstrator that you personally work with, drop me a request with your address at stampdabbles@gmail.com and I will be glad to mail you one along with a handmade card and a printed Wish List.
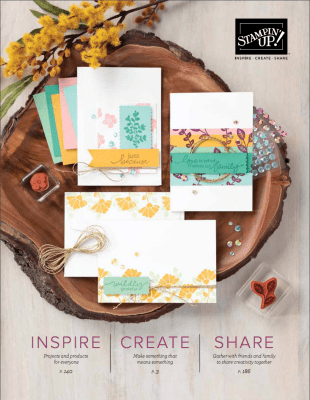
2020-21 Stampin’ Up! Annual Catalog
You can check it out digitally HERE
Ordering
Once you have found the thing(s) in the catalog that you love and just have to have. You can order them by clicking the cute Market Shop photo in the Sidebar (or HERE). If you need some help in putting together a design or knowing what products you need to put together with your stamps, I would love to help. Just drop me a quick note at stampdabbles@gmail.com and we’ll go from there. We can follow up with a phone call, a Zoom “face-to-face”, email or text….whatever works for you.
You will also receive $10 in product credit for every $50 you spend when you use the monthly Host Code at the bottom of my posts…the current Host Code is QZXSZQH3. (If your order is $150 or more, you will receive your own code which includes my reward as well as additional rewards from Stampin’ Up! – see the Rewards Tab for details). You will also receive loyalty points which will translate into more free product. You can find a Loyalty Order Tracking Form HERE to help you keep track.


")


 Crinkled Seam Binding Ribbon")


