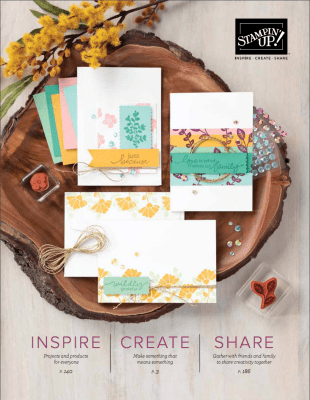
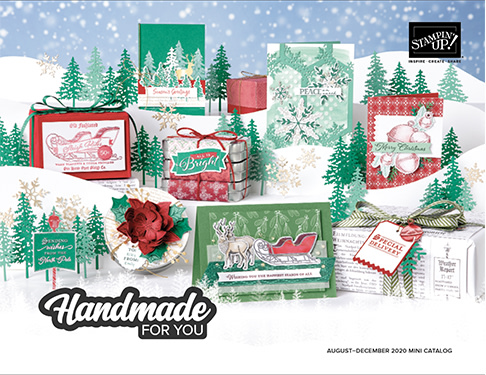
Stampin’ Up! Final Hours for Jan-June 2021 Mini Catalog Products and True Love Thinking of You Card

This card features the True Love 12″ x 12″ Designer Series Paper from the January-June 2021 Mini Catalog. I have really enjoyed it and it is going away tonight along with the other items on the Last Chance Product List (see below the card). Don’t miss out on any of the items you might be longing for…click Click here to hop on over to my online store to purchase items while there is still supply available! The products will no longer be available after June 30 at 11:59 pm MT.

The Paper Cuts

  • Thick Basic White Cardstock: 11″ x 4 1/4″, scored at 5 1/2″ (card base) and a stitched circle die cut from Warm Hugs Dies.
  • True Love 12″ x 12″ Designer Series Paper: 4 1/2″ x 5″ cut into 3 1 1/2″ strips on the long side and 5 3/4″ x 2 1/4″ (envelope flap).
  • Basic Black Cardstock: 4″ x 5 1/4″ (front layer)
  • Polished Pink Cardstock: the 4th largest die from Encircled in Beauty Dies.

The Creating

I began by assembling the black and white layers onto the card base with Multipurpose Liquid Glue. Then I added the sentiments from the Beauty of Friendship Cling Stamp Set with Tuxedo Black Ink. I adhered the stamped, stitched circle from Warm Hugs Dies to the Polished Pink die cut from the Encircled in Beauty Dies. I popped the layered piece on with Stampin’ Dimensionals.

I added three Polished Pink 2021-2023 In Color Jewels to embellish. So pretty! I adhered the remaining piece of True Love DSP to the flap of the envelope and trimmed the excess with my Paper Snips for a coordinating set.

I hope you enjoyed the card. If you have any questions or need a catalog, I’d be very happy to be your Demonstrator.   You can drop me an email at stampdabbles@gmail.com. I’d love to hear from you!

Happy Stamp Dabbling!

  • Visit my online store here.
  • The current Host Code is 4DGWPN4B.
  • Shop the Clearance Rack here.
  • Reserve a Paper Pumpkin Subscription here.
  • New to Stamping? Check out the Beginner’s Brochure here.
  • Earn FREE Stampin’ Up! Products – See Customer Rewards here. It’s my way to say thank you!
  • In addition to my online store, I also take PayPal payments for orders. See the bottom of the Customer Rewards page here for details.
  • Click here to purchase your Starter Kit

Product List

June Host Code: 
  • 4DGWPN4B
  • Use this host code when you order $50 or greater and receive a free gift from me!  If your order is over $150, please do not use this code, but you’ll still get the free gift.  The free gift is your choice of any item valued up to $10.00 in the 2021-22 Annual Catalog or January-June 2021 Mini Catalog!  That includes some of the Host Exclusive stamp sets!  See my Rewards page for full details.

    Make sure that you can see my name on the final checkout page listed as your Demonstrator when you order so that you know that you’re ordering with me and you’ll get my rewards!


    Retiring List and Ordering (Ends June 30 at 11:59 pm MT):

    Click here for a listing of items that are retiring. It is sorted alphabetically by item type (stamp sets, tools, embellishments, etc) and has a column for discounted pricing where available.

    Click here for my online store to purchase items while there is still supply available!


    We all love gorgeous Designer Series Paper, and during this incredible sale, you can enjoy a 15% discount on select papers from the 2021–2022 Annual Catalog! July is a great time to stock up and save on some of Stampin’ Up!’s most popular paper designs!

    PROMOTION DETAILS:

    • Sales Period:  July 1 – August 2
    • All order types qualify for this promotion.
    • There is no limit to how many packages of Designer Series Paper may be purchased during this promotion.
    • Only select Designer Series Papers are available at a 15% discount during this promotion.
    • Orders must be placed—and closed—during the promotion period for the 15% discount to apply.
    • Designer Series Paper ordered as part of a Starter Kit or with Stampin’ Rewards qualify for the 15% discount.
    • Order Deadline:  August 2, 2021 at 11:59 PM (MT)

    You can see the pretty papers that are included in this sale on this flyer (click the image to open a full-size printable flyer):


    Stampin’ Up! Encircled in Friendship Thank You Card

    I used the Encircled in Friendship Bundle and the Expressions in Ink 12″ x 12″ Specialty Designer Series Paper to make this Thank You card. Enjoy!

    The Paper Cuts

    • Pale Papaya Cardstock: 11″ x 4 1/4″, scored at 5 1/2″
    • Expressions in Ink 12″ x 12″ Specialty Designer Series Paper: 5 1/8″ x 3 7/8″ (front panel), 1/2″ x 4″ (inside strip) and 2 1/4″ x 5 3/4″ (envelope flap)
    • In Color Shimmer Vellum: 4″ x 4″ (largest, outline die cut)
    • Basic White Cardstock: 5 1/4″ x 4″ (inside) and the 3″ x 3 1/8″ (for die cut)
    For this card, the two dies used from Encircled in Beauty Dies are the 1st one (cut in Pale Papaya In Color Shimmer Vellum) and the first one on the second row (cut in Basic White Cardstock).

    The Creating

    I began by die cutting as indicated above with the Stampin’ Cut & Emboss Machine. I stamped the sentiment from the Encircled in Friendship Cling Stamp Set with Soft Succulent Ink. I also added the sentiment on the inside panel (it’s slightly off center to the left to accommodate the DSP strip).

    To assemble the card, I used Multipurpose Liquid Adhesive on the front and inside panels. For the vellum, I placed the sentiment die cut on top and flipped it over so that I had a guide to place the liquid adhesive. I wanted the edges to be free for a little lift and texture. Then, I popped up the sentiment stamped die cut up with Stampin’ Dimensionals which hid any adhesive that may have shown through the vellum. The DSP panel was adhered to the envelope flap and trimmed with Paper Snips for a coordinated set.

    To embellish, I added Pale Papaya 2021-23 In Color Jewels with the putty end of the Take Your Pick Tool.

    If you have any questions or need a catalog, I’d be very happy to be your Demonstrator.   You can drop me an email at stampdabbles@gmail.com. I’d love to hear from you!

    Happy Stamp Dabbling!

    • Visit my online store here.
    • The current Host Code is 4DGWPN4B.
    • Shop the Clearance Rack here.
    • Reserve a Paper Pumpkin Subscription here.
    • New to Stamping? Check out the Beginner’s Brochure here.
    • Earn FREE Stampin’ Up! Products – See Customer Rewards here. It’s my way to say thank you!
    • In addition to my online store, I also take PayPal payments for orders. See the bottom of the Customer Rewards page here for details.
    • Click here to purchase your Starter Kit

    Product List

    June Host Code: 
  • 4DGWPN4B
  • Use this host code when you order $50 or greater and receive a free gift from me!  If your order is over $150, please do not use this code, but you’ll still get the free gift.  The free gift is your choice of any item valued up to $10.00 in the 2021-22 Annual Catalog or January-June 2021 Mini Catalog!  That includes some of the Host Exclusive stamp sets!  See my Rewards page for full details.

    Make sure that you can see my name on the final checkout page listed as your Demonstrator when you order so that you know that you’re ordering with me and you’ll get my rewards!


    Retiring List and Ordering (Ends June 30 at 11:59 pm MT):

    Click here for a listing of items that are retiring. It is sorted alphabetically by item type (stamp sets, tools, embellishments, etc) and has a column for discounted pricing where available.

    Click here for my online store to purchase items while there is still supply available!


    Stampin’ Up! Encircled in Friendship Card

    I received the Encircled in Friendship bundle from my sweet upline, Amy, yesterday and I couldn’t wait to use it! The Encircled in Friendship Cling Stamp Set has beautiful sentiments, floral images, and a little bit of coloring. The Encircled in Beauty Dies are incredible! I had to cut one of each right away. In addition to cards, they will be great frames for scrapbooking. Thank you, Amy! BTW, the True Love 12×12 DSP will be going away at the end of the month. Grab it while you can and enjoy the card!

    The Paper Cuts

    • Flirty Flamingo Cardstock: 11″ x 4 1/4″, scored at 5 1/2″ (cardbase).
    • Basic White Cardstock: largest lace edge die from Encircled in Beauty Dies, 5 5/16″ x 3 15/16″ (front panel) and 5 1/4″ x 4″ (inside panel).
    • True Love Designer Series Paper: largest Stitched Rectangle Die (front panel); left over strip from the edge (inside).
    These are the incredible dies! I have more playing to do! I need to cut some in colors…maybe that pretty Shimmer Vellum?

    The Creating

    I began by stamping the small floral image around the die cut with Tuxedo Black Ink (no measuring involved, just winged it…not perfect, but it’s all good!). I added the sentiments in the middle and on the inside panel. I colored the flowers with Light and Dark Flirty Flamingo Stampin’ Blends and the Light and Dark Old Olive Stampin’ Blends. I repeated on the inside panel and the bottom edge of the envelope.

    To assemble the card, I used Multipurpose Liquid Adhesive on the front and inside panels and the die cut left over edge on the inside. I popped up the decorated Encircled Beauty die cut with Stampin’ Dimensionals.

    To embellish, I added Matte Black Dots between the floral images with the putty end of the Take Your Pick Tool.

    If you have any questions or need a catalog, I’d be very happy to be your Demonstrator.   You can drop me an email at stampdabbles@gmail.com. I’d love to hear from you!

    Happy Stamp Dabbling!

    • Visit my online store here.
    • The current Host Code is 4DGWPN4B.
    • Shop the Clearance Rack here.
    • Reserve a Paper Pumpkin Subscription here.
    • New to Stamping? Check out the Beginner’s Brochure here.
    • Earn FREE Stampin’ Up! Products – See Customer Rewards here. It’s my way to say thank you!
    • In addition to my online store, I also take PayPal payments for orders. See the bottom of the Customer Rewards page here for details.
    • Click here to purchase your Starter Kit

    Product List

    June Host Code: 
  • 4DGWPN4B
  • Use this host code when you order $50 or greater and receive a free gift from me!  If your order is over $150, please do not use this code, but you’ll still get the free gift.  The free gift is your choice of any item valued up to $10.00 in the 2021-22 Annual Catalog or January-June 2021 Mini Catalog!  That includes some of the Host Exclusive stamp sets!  See my Rewards page for full details.

    Make sure that you can see my name on the final checkout page listed as your Demonstrator when you order so that you know that you’re ordering with me and you’ll get my rewards!


    Retiring List and Ordering (Ends June 30 at 11:59 pm MT):

    Click here for a listing of items that are retiring. It is sorted alphabetically by item type (stamp sets, tools, embellishments, etc) and has a column for discounted pricing where available.

    Click here for my online store to purchase items while there is still supply available!


    Stampin’ Up! Artistically Inked Golden Birthday Card

    I used the Artistically Inked Bundle and the Pretty Flowers Embossing Folder from the 2021-22 Annual Catalog to create this elegant birthday card. When my order arrived from Stampin’ Up! the first thing I did was pull out this bundle and embossing folder and run them through the Stampin’ Cut and Emboss Machine! The detail is amazing. Enjoy!

    The Paper Cuts

    • Basic White Thick Cardstock: 4 1/4′′ x 11′′ scored at 5 1/2′′ (card base)
    • Basic White Cardstock: 4″ x 5 1/4″ panel (dry embossing) and 4″ x 1/2″ (sentiment)
    • Gold Foil Sheets: 4″ x 8″ (die cutting) and 4″ x 5/8″ (sentiment layer)

    The Creating

    With VersaMark Ink I stamped the “Happy Birthday” sentiment from the Artistically Inked Cling Stamp Set onto the Basic White strip, sprinkled it with Gold Stampin’ Emboss Powder, tapped off the excess, and melted the powder with the Heat Tool. I repeated the process for the “Best Wishes” sentiment on the inside of the Basic White Thick card base.

    I placed the Basic White panel into the Pretty Flowers Embossing Folder and ran it through the Stampin’ Cut and Emboss Machine (folded end first). I also cut two of the large floral die from Gold Foil Sheet.


    To assemble the card, I adhered the sentiment strip to the Gold Foil strip with Multipurpose Liquid Glue and then adhered it near the bottom of the embossed panel. I adhered the embossed panel to the card base with Stampin’ Dimensionals. Tip: the pokey end of the Take Your Pick Tool makes quick work of removing the paper from the back of dimensionals.

    I cut one of the floral die cuts in half to use on the inside of the card and on the envelope. To adhere the floral die cuts in place I dipped 1/8th of a Stampin’ Sponge into a dollop of liquid glue that I squeezed onto my Silicone Craft Mat and then applied it to the back of the detailed die cut. Tip: put a binder clip on the narrow end of the sponge wedge as a handle and keep in a small rubbermaid container for repeated use. I used my Paper Snips to trim any excess die cut away from the edges.

    For the final embellishment I adhered three Champagne Rhinestone Basic Jewels around the die cut image on the front of the card. So pretty and so simple!


    If you need any stamping supplies or a catalog, I’d be very happy to be your Demonstrator.   You can drop me an email me with any questions at stampdabbles@gmail.com. I’d love to hear from you!

    Happy Stamp Dabbling!

    • Visit my online store here.
    • The current Host Code is R43GYR4M.
    • Shop the Clearance Rack here.
    • Reserve a Paper Pumpkin Subscription here.
    • New to Stamping? Check out the Beginner’s Brochure here.
    • Earn FREE Stampin’ Up! Products – See Customer Rewards here. It’s my way to say thank you!
    • In addition to my online store, I also take PayPal payments for orders. See the bottom of the Customer Rewards page here for details.
    • Click here to purchase your Starter Kit

    Product List

    May Host Code: R43GYR4M

    Use this host code when you order $50 or greater and receive a free gift from me!  If your order is over $150, please do not use this code, but you’ll still get the free gift.  The free gift is your choice of any item valued up to $10.00 in the 2021-22 Annual Catalog or January-June 2021 Mini Catalog!  That includes some of the Host Exclusive stamp sets!  See my Rewards page for full details.

    Make sure that you can see my name on the final checkout page listed as your Demonstrator when you order so that you know that you’re ordering with me and you’ll get my rewards!


    New 2021-2022 Annual Catalog!

    Stampin’ Up! is celebrating the release of the new 2021-2022 Annual Catalog! Click here to view the Catalog PDF and check out all the fabulous new products and creative ideas! If you don’t have a demonstrator and would like a paper copy of the catalog I’d love to send you one. Just click here and request. You’ll find a Wish List here to add your favorite things. Can’t wait? Click here to shop. Enjoy!


    Stampin’ Up! Positive Thoughts Friendship Card

    I used the Positive Thoughts Stamp Set and the coordinating Nature’s Thoughts Dies from the 2021-22 Annual Catalog to create this pretty in Polished Pink friendship card. It features 2021-23 In Colors in the cardstock, inks and embellishments. Enjoy!

    The Paper Cuts

    • Polished Pink Cardstock: 4 1/4′′ x 11′′ scored at 5 1/2′′ (card base)
    • Basic White Cardstock: two 4″ x 5 1/4″ panels (inside and card front) and 4 1/2″ x 11″ (stamping & die cutting)
    • Soft Succulent Cardstock: 1″ x 4″ (die cutting sprigs)

    The Creating

    With Positive Pink Ink I stamped the “Friends like you” sentiment from the Positive Thoughts Cling Stamp Set onto the top right corner of a Basic White panel and the “Hugs, Prayer, Love” on the center of the other Basic White panel. I also stamped three of the floral images on the Basic White strip.

    With Soft Succulent Ink, I stamped three of the fern frond images on the Basic White Strip. I also stamped a couple on the inside panel in first generation and second generation ink. I repeated on the envelope including a third generation as well.

    I used the floral outline and fern frond outline dies from Nature’s Thoughts Dies to cut out the images with the Stampin’ Cut and Emboss Machine. I also cut out the floral center die three times from the remaining Basic White strip. This die is so cool because you can use your Take Your Pick Tool to raise the small petals so that the color peeks from underneath! I also die cut four of the 3 leaf die and one of the 6 leaf die from the Soft Succulent Cardstock.


    To assemble the card, I positioned the fern fronds and adhered the top two with Multipurpose Liquid Glue and the bottom one with Stampin’ Dimensionals. I then added the pink flowers…the top right with liquid glue and the other two with Stampin’ Dimensionals. I added the white centers with dots of liquid glue. I tucked the small leaf die cuts in with liquid glue.

    The final embellishment is three Polished Pink 2021-23 In Color Jewels in the center of each flower.


    If you need any stamping supplies or a catalog, I’d be very happy to be your Demonstrator.   You can drop me an email me with any questions at stampdabbles@gmail.com. I’d love to hear from you!

    Happy Stamp Dabbling!

    • Visit my online store here.
    • The current Host Code is R43GYR4M.
    • Shop the Clearance Rack here.
    • Reserve a Paper Pumpkin Subscription here.
    • New to Stamping? Check out the Beginner’s Brochure here.
    • Earn FREE Stampin’ Up! Products – See Customer Rewards here. It’s my way to say thank you!
    • In addition to my online store, I also take PayPal payments for orders. See the bottom of the Customer Rewards page here for details.
    • Click here to purchase your Starter Kit

    Product List

    May Host Code: R43GYR4M

    Use this host code when you order $50 or greater and receive a free gift from me!  If your order is over $150, please do not use this code, but you’ll still get the free gift.  The free gift is your choice of any item valued up to $10.00 in the 2021-22 Annual Catalog or January-June 2021 Mini Catalog!  That includes some of the Host Exclusive stamp sets!  See my Rewards page for full details.

    Make sure that you can see my name on the final checkout page listed as your Demonstrator when you order so that you know that you’re ordering with me and you’ll get my rewards!


    New 2021-2022 Annual Catalog!

    Stampin’ Up! is celebrating the release of the new 2021-2022 Annual Catalog! Click here to view the Catalog PDF and check out all the fabulous new products and creative ideas! If you don’t have a demonstrator and would like a paper copy of the catalog I’d love to send you one. Just click here and request. You’ll find a Wish List here to add your favorite things. Can’t wait? Click here to shop. Enjoy!


    Stampin’ Up! Pansy Patch Thank You Card

    I used the Pansy Patch Photopolymer Stamp Set and the coordinating Pansy Petals 12×12 Designer Series Paper from the 2021-22 Annual Catalog to create this thank you card. It also features 2021-23 In Colors in the cardstock and embellishments. Enjoy!

    The Paper Cuts

    • Soft Succulent Cardstock: 4 1/4′′ x 11′′ scored at 5 1/2′′ (card base) and 2 1/4″ square (sentiment).
    • Evening Evergreen Cardstock: 4 – 1 3/4″ squares and the 4th largest scallop die cut from Layering Circles Dies.
    • Pansy Petals 12×12 Designer Series Paper: 2 – 1 1/2″ squares from one pattern, 2 – 1 1/2″ squares from a second pattern, 4″ x 1/2″ (inside) and 2 1/4″ x 6″ (envelope).
    • Vellum Cardstock: 3rd largest scallop die cut from Layering Circles Dies.
    • Basic White Cardstock: 4″ x 5 1/4″ (inside panel).

    The Creating

    I began by stamping the “Thank You” sentiment from the Pansy Patch Photopolymer Stamp Set onto the center of the Soft Succulent square with Evening Evergreen Ink. I ran it through the Stampin’ Cut and Emboss Machine with the 4th from the smallest smooth die. I adhered the die cut to the Evening Evergreen scallop circle die cut with Multipurpose Liquid Glue. I added Stampin’ Dimensionals to the back and adhered it to the Vellum scallop die cut. I folded a 3″ piece of Pale Papaya 3/8″ Open Weave Ribbon in half over a Mini Glue Dot to hold it in place and then another Mini Glue Dot to adhere the ribbon to the back of the vellum at about the 2 o’clock position so it would be in the top right square.

    I used Multipurpose Liquid Glue to adhere the 1 1/2″ DSP squares to the 1 3/4″ Evening Evergreen squares and then to the card front. I also added the Vellum tag making sure the glue was covered by the Evening Evergreen circle. I added three of the Pale Papaya 2021-23 In Color Jewels along the bottom left square.


    I stamped the inside sentiment with Evening Evergreen Ink on the Basic White panel and added the DSP strip to the bottom with liquid glue before adhering it to the card base. I adhered the matching DSP to the envelope flap with liquid glue and trimmed the excess away with Paper Snips.


    If you need any stamping supplies or a catalog, I’d be very happy to be your Demonstrator.   You can drop me an email me with any questions at stampdabbles@gmail.com. I’d love to hear from you!

    Happy Stamp Dabbling!

    • Visit my online store here.
    • The current Host Code is R43GYR4M.
    • Shop the Clearance Rack here.
    • Reserve a Paper Pumpkin Subscription here.
    • New to Stamping? Check out the Beginner’s Brochure here.
    • Earn FREE Stampin’ Up! Products – See Customer Rewards here. It’s my way to say thank you!
    • In addition to my online store, I also take PayPal payments for orders. See the bottom of the Customer Rewards page here for details.
    • Click here to purchase your Starter Kit

    Product List

    May Host Code: R43GYR4M

    Use this host code when you order $50 or greater and receive a free gift from me!  If your order is over $150, please do not use this code, but you’ll still get the free gift.  The free gift is your choice of any item valued up to $10.00 in the 2021-22 Annual Catalog or January-June 2021 Mini Catalog!  That includes some of the Host Exclusive stamp sets!  See my Rewards page for full details.

    Make sure that you can see my name on the final checkout page listed as your Demonstrator when you order so that you know that you’re ordering with me and you’ll get my rewards!


    New 2021-2022 Annual Catalog!

    Stampin’ Up! is celebrating the release of the new 2021-2022 Annual Catalog! Click here to view the Catalog PDF and check out all the fabulous new products and creative ideas! If you don’t have a demonstrator and would like a paper copy of the catalog I’d love to send you one. Just click here and request. You’ll find a Wish List here to add your favorite things. Can’t wait? Click here to shop. Enjoy!


    Stampin’ Up! Timeless Tropical Peek-A-Boo Thank You Card

    I used the Timeless Tropical Photopolymer Stamp Set and the coordinating In The Tropics Dies from the 2021-22 Annual Catalog to create this thank you card. It features a fun peek-a-boo die cut with a smooth circle die from the Layering Circles Dies. Enjoy!

    The Paper Cuts

    • Basic White Thick Cardstock: 4 1/4′′ x 11′′ scored at 5 1/2′′ (card base).
    • Basic White Cardstock: 3” x 6” (for stamping & die cutting)
    • Flirty Flamingo Cardstock: 1″ x 2″
    • Old Olive Cardstock: 1″ x 4″

    The Creating

    I began by stamping the two flower images and two leaves on Basic White Cardstock with Tuxedo Black Ink. I colored them with Stampin’ Blends Combos. I began by filling in two petals (with the stamin) of the hibiscus with Light Flirty Flamingo, adding a slightly smaller layer of Dark Flirty Flamingo, then Light Real Red, Dark Real Red, Light Cherry Cobbler and Dark Cherry Cobbler. Tip: when working with a smaller area the edges stay wet long enough to blend without going back over them. I repeated for the other 3 petals. For the smaller flower I used the same method with Light So Saffron , adding Dark So Saffron, Light Mango Melody and Dark Mango Melody. For the leaves I used Light and Dark Old Olive. For the stamin, I colored it in with Light Flirty Flamingo, added Light So Saffron on top and then dotted Dark Flirty Flamingo and Light Old Olive on the top half. I then die cut the images by running them through the Stampin’ Cut and Emboss Machine with the coordinating In The Tropics Dies. I also cut the little flowers die from a scrap of Flirty Flamingo Cardstock and the small green leaves from a scrap of Old Olive Cardstock.


    Next I cut the 2nd largest smooth circle die cut from Layering Circles Dies from the card front about 3/4″ from the top and sides. I placed the card on the Stamp-a-ratus open to the inside and placed the sentiment and hibiscus stamp down and closed the top to check the placement. Once satisfied, I picked up the stamps, inked them with Tuxedo Black and stamped them. I masked the hibiscus and stamped the two leaves. I also added the hibiscus and leaves to the corner of the Basic White Medium Envelope. Tip: to make the mask, stamp the image on a post it note, catching the sticky edge then trim the image out on the stamped line with Paper Snips. I then used the Stampin’ Blends to color as before. Tip: place a scrap of paper in the envelope to prevent bleed through to the other side.

    I adhered the die cut hibiscus, yellow flower and one of the leaves with Stampin’ Dimensionals and Mini Stampin’ Dimensionals. The other components are adhered with Multipurpose Liquid Adhesive. I embellished with Wink of Stella on the Stamins and 3 Crushed Curry Holiday Rhinestone Jewels to some of the flower centers.


    If you need any stamping supplies or a catalog, I’d be very happy to be your Demonstrator.   You can drop me an email me with any questions at stampdabbles@gmail.com. I’d love to hear from you!

    Happy Stamp Dabbling!

    • Visit my online store here.
    • The current Host Code is R43GYR4M.
    • Shop the Clearance Rack here.
    • Reserve a Paper Pumpkin Subscription here.
    • New to Stamping? Check out the Beginner’s Brochure here.
    • Earn FREE Stampin’ Up! Products – See Customer Rewards here. It’s my way to say thank you!
    • In addition to my online store, I also take PayPal payments for orders. See the bottom of the Customer Rewards page here for details.
    • Click here to purchase your Starter Kit

    Product List

    May Host Code: R43GYR4M

    Use this host code when you order $50 or greater and receive a free gift from me!  If your order is over $150, please do not use this code, but you’ll still get the free gift.  The free gift is your choice of any item valued up to $10.00 in the 2021-22 Annual Catalog or January-June 2021 Mini Catalog!  That includes some of the Host Exclusive stamp sets!  See my Rewards page for full details.

    Make sure that you can see my name on the final checkout page listed as your Demonstrator when you order so that you know that you’re ordering with me and you’ll get my rewards!


    New 2021-2022 Annual Catalog!

    Stampin’ Up! is celebrating the release of the new 2021-2022 Annual Catalog! Click here to view the Catalog PDF and check out all the fabulous new products and creative ideas! If you don’t have a demonstrator and would like a paper copy of the catalog I’d love to send you one. Just click here and request. You’ll find a Wish List here to add your favorite things. Can’t wait? Click here to shop. Enjoy!


    Stampin’ Up! Fine Art Floral Suite Notecard

    This card was created with products from the Fine Art Floral Suite. It’s my favorite suite of products from the January – June 2021 Mini Catalog. While I’ve used it a lot, I hadn’t braved the Gilded Leafing Embellishment. I’ve been missing out! It’s fun and very pretty. Enjoy!


    The Paper Cuts 

    • Crumb Cake Cardstock: 4 1/4″ x 11″ scored at 5 1/2″ (card base) and 3 1/4″ x 3 1/4″ (embossed panel)
    • Flirty Flamingo Cardstock: 3 1/2″ x 3 1/2″ (front panel) and 2 1/2″ x 2 1/2″ (floral image)
    • Pear Pizzazz Cardstock: 1″ x 1 1/2″ (leaf image)

    The Creating

    • I stamped the full floral image from the Art Gallery Stamp Set on Flirty Flamingo Cardstock with Flirty Flamingo Ink. With VersaMark Ink I stamped the 2nd step floral image on top and sprinkled on the Heat & Stick Powder. I heated it with the Heat Tool until it was clear and then pressed the flower into my container of Gilded Leafing Embellishment. I used a stiff paintbrush to remove the excess leafing. Isn’t it pretty?
    • I inked one of the leaves on the stemmed leaf stamp in Pear Pizzazz Ink and stamped it onto a scrap of Pear Pizzazz Cardstock.
    • I ran the stamped leaf and flower through the Stampin’ Cut & Emboss Machine with the coordinating dies from Floral Gallery Dies. I snipped the leaf from the stem with Paper Snips.
    • I ran the small Crumb Cake square through the Stampin’ Cut & Emboss Machine inside the Painted Texture 3D Embossing Folder. I adhered it to the Flirty Flamingo Cardstock square and knotted a piece of the Fine Art Ribbon around and trimmed the ends. I adhered the panel to the card front with Multipurpose Liquid Glue.
    • I stamped the sentiment in Flirty Flamingo Ink on the card front below the embossed panel.
    • The floral image is popped up with Stampin’ Dimensionals. The leaf is tucked in underneath with liquid glue.
    • I added a floral image to the inside of the notecard and on the envelope. It is stamped with Flirty Flamingo Ink with the full image in 2nd generation and the top (2nd step) image in 1st generation ink.

    Let me know if you have any questions!  You can drop me an email me at stampdabbles@gmail.com. I’d love to hear from you. 

    Happy Stamp Dabbling!

    • Visit my online store here.
    • The current Host Code is URAXHKGA
    • Shop the Clearance Rack here.
    • Reserve a Paper Pumpkin Subscription here.
    • New to Stamping? Check out the Beginner’s Brochure here.
    • Earn FREE Stampin’ Up! Products – See Customer Rewards here. It’s my way to say thank you!
    • In addition to my online store, I also take PayPal payments for orders. See the bottom of the Customer Rewards page here for details.
    • Click here to purchase your Starter Kit

    Product List

    March Host Code:  URAXHKGA

    Use this host code when you order $50 or greater and receive a free gift from me!  If your order is over $150, please do not use this code, but you’ll still get the free gift.  The free gift is your choice of any item valued up to $10.00 in the 2020-21 Annual Catalog or January-June 2021 Mini Catalog!  That includes some of the Host Exclusive stamp sets!  See my Rewards page for full details.

    Make sure that you can see my name on the final checkout page listed as your Demonstrator when you order so that you know that you’re ordering with me and you’ll get my rewards!


    Sales Period: March 24th from 1:00 PM (MT) through May 3rd, 2021 at 11:59 PM (MT).

    Here are the official retiring lists from Stampin’ Up!

    Head over to my online store to pick up those retiring items now!  They’re only available while supplies last from now through May 3!

    Stampin’ Up! Art Gallery Spring Card for Amy’s Inkin’ Krew Blog Hop

    Welcome to Amy’s Inkin’ Krew Blog Hop for March! Today we are sharing “Celebrate Spring” projects. You will find links at the bottom of my post to hop you along the way to the projects. Be sure to check out all of our talented team members projects to see how they interpreted the theme and what they have made for you!

    I used the Art Gallery Photopolymer Stamp Set from the 2021 January to June Mini Catalog (with a few other select stamps and dies) to make a Thinking of You Card with bright Spring colors and flowers that would brighten anyone’s day! There are links to the products used at the end of the blog. I hope you enjoy the card!

    The Paper Cuts

    • Basic White Thick Cardstock: 4 1/4″ x 11″ scored at 5 1/2″ (card base), largest Stitched Rectangle Dies die cut, and the middle Stitched Shapes Dies circle die cut.
    • Garden Green Cardstock: 4″ x 5 1/4″

    The Creating

    • I began by tracing the outline of the Stitched Shapes Dies medium circle onto the center of the Stitched Rectangles Dies die cut lightly with a pencil. This provided me with a stamping guide to know what would and what wouldn’t show from beneath the actual mounted die cut.
    • I then used Magenta Madness Ink to ink the top three flowers on the largest floral stamp in the Art Gallery Photopolymer Stamp Set. I stamped it once at the top and once at the bottom of the circle.
    • Using Gorgeous Grape Ink, I stamped the double floral image from the Art Gallery Photopolymer Stamp Set once on the left and once on the right of the circle.
    • With Bumblebee Ink, I added four of the small floral image from the Art Gallery Photopolymer Stamp Set in between the purple and pink images.
    • I then stamped the tiny flower from Blossoms in Bloom Photopolymer Stamp Set (2020-22 Annual Catalog) with Seaside Spray Ink.
    • Finally I added the double leaf image from Beautiful Friendship Photopolymer Stamp Set (2020-22 Annual Catalog) in Garden Green Ink.
    • With Garden Green Ink, I stamped the “Thinking of You” sentiment from the Blossoms in Bloom Photopolymer Stamp Set centered inside the Stitched Shapes Dies circle die cut. I also stamped the greeting from the Happy Thoughts Cling Stamp Set on the inside of the card base.
    • I repeated the flowers on the inside of the card and on the envelope flap. Don’t you love a matching set?
    • To assemble the card front I used Multipurpose Liquid Glue to adhere the stamped Stitched Rectangle to the Garden Green panel and then both to the card base. I erased the pencil marks and then popped the Stitched Shapes die cut on with Stampin’ Dimensionals.
    • To embellish, I added three Magenta Madness 2020-2022 In Color Enamel Dots.

    Alright, on with the hop!  Click on the Next Blog button to move forward to Connie Troyer’s project or click the Previous Blog button to move back to see the project that Sue Prather created.

    If you get lost along the way, the participants and links are listed below:

    1. Jaimie Babarczy
    2. Karen Ksenzakovic
    3. Mary Deatherage
    4. Sue Prather
    5. Donna Leonard =>You are here.
    6. Connie Troyer
    7. Jillian Good
    8. Tara Carpenter
    9. Leslie Larkin
    10. Terry Lynn Bright
    11. Akiko Sudano
    12. Karen Finkle
    13. Amy Koenders
    14. Krista Yagci

    If you need any stamping supplies, I’d be very happy to be your Demonstrator.  Just click on the links above or below or the shop image on on the right side of the screen to go directly to my online store. Be sure to use the Host Code if your order is $50-$149 so you’ll get Customer Rewards. You can drop me an email me with any questions at stampdabbles@gmail.com. I’d love to hear from you!

    Happy Stamp Dabbling!

    • Visit my online store here.
    • The current Host Code is URAXHKGA
    • Shop the Clearance Rack here.
    • Reserve a Paper Pumpkin Subscription here.
    • New to Stamping? Check out the Beginner’s Brochure here.
    • Earn FREE Stampin’ Up! Products – See Customer Rewards here. It’s my way to say thank you!
    • In addition to my online store, I also take PayPal payments for orders. See the bottom of the Customer Rewards page here for details.
    • Want to get a 20% discount and be a part of our awesome team? Click here to purchase your Starter Kit.
    Product List

    Butterfly Brilliance Collection – Early Release

    Bring in the beauty of nature with the artistic designs of the Butterfly Brilliance Bundle and coordinating designer series paper, along with textured specialty paper that will put a pop of brilliance on every project. The Butterfly Brilliance Collection is an early release from the upcoming 2022 Annual Catalog and will be available from March 2 through May 3, 2021.

    • See more details HERE.
    • Purchase the collections HERE.

    Limited Time – Hey Chick and Hey Birthday Chick Bundles

    Stampin’ Up! has released two new coordinating bundles available now through June 30, 2021. Click HERE to see the details and card samples.


    January – June 2021 Mini Catalog

    You will find many wonderful, beautiful, creative and fun ideas and products inside. You can check it out digitally HERE. If you do not already have a Demonstrator that you personally work with, drop me a request with your address at stampdabbles@gmail.com and I will be glad to mail you one along with a handmade card and a printed Wish List.


    2020-21 Stampin’ Up! Annual Catalog

    You can check it out digitally HERE

    Ordering

    Once you have found the thing(s) in the catalog that you love and just have to have. You can order them by clicking the cute Market Shop photo in the Sidebar (or HERE). If you need some help in putting together a design or knowing what products you need to put together with your stamps, I would love to help. Just drop me a quick note at stampdabbles@gmail.com and we’ll go from there. We can follow up with a phone call, a Zoom “face-to-face”, email or text….whatever works for you. 

    You will also receive $10 in product credit for every $50 you spend when you use the monthly Host Code at the bottom of my posts. (If your order is $150 or more, you will receive your own code which includes my reward as well as additional rewards from Stampin’ Up! – see the Rewards Tab for details). You will also receive loyalty points which will translate into more free product. You can find a Loyalty Order Tracking Form HERE to help you keep track.

    Stampin’ Up! Jan to Jun Mini Catalog Sneak Peek – Art Gallery Bundle

    As a Stampin’ Up! Demonstrator (discount shopper or business) you get to order from the upcoming catalog a month in advance. It’s so exciting to see the new things and be able to try them out early. Another perk of being a Stampin’ Up! Demonstrator is being part of a team to network, share ideas and encourage each other in something you all love to do. My team gets together monthly and today was the day! Several team members presented card tutorials and presentations (all were wonderful!) for which we could follow along. I loved this card that Amy Koenders presented, however, I did not have the stamp set. I thought maybe you would like to see the results and thoughts that went behind choosing alternatives for the design. (I”m a little embarrassed to place my card next to Amy’s beautiful one, but here goes).

    Both of these cards are made with new sets in the upcoming January – June 2021 Mini Catalog. I decided to stick with the same color scheme Amy used with the red/pink and greens. The new Fine Art Floral Designer Series Paper fit the bill with Poppy Parade, Flirty Flamingo and Old Olive. Amy’s colors are Poppy Parade, Granny Apple Green, Daffodil Delight and Balmy Blue.

    For the design I exchanged medium flowers for the strawberry focal images (Sweet Strawberry Bundle) and coordinating the smaller matching floral accents. I changed up the greeting to use one included in the same Art Gallery stamp set with a coordinating die from the Floral Gallery Dies. The greenery in the background is a larger stamp with 3 flowers on top, but I only inked the “berries” and stamped it 3 times. Two of the flowers and the sentiment are popped up with Stampin’ Dimensionals accented with Poppy Parade All The Trimmings Embellishments (on sale 50% off – $4 on Dec 8th while supplies last). The Berry Delightful Designer Series Paper on Amy’s card is FREE with a $100 order during Sale-A-Bration, January 5th – February 28, 2021.

    The Paper Cuts

    • Poppy Parade Cardstock: 4 1/4″ x 11″, scored at 5 1/2″ for the card base.
    • Old Olive Cardstock: 3 1/8″ x 4 1/2″ panel
    • Fine Art Floral Designer Series Paper: 4 1/8″ x 5 3/8″ (Amy’s is 4 1/4″ x 5 1/2″ – no border) and a 1/2″ x 4″ strip for the inside.
    • Whisper White Cardstock: 3rd largest Stitched Rectangle Die, the longer label from Floral Gallery Dies and a 4″ x 5 1/4″ panel for the inside.

    I hope you have enjoyed seeing two different cards from the same design and also enjoyed seeing sneak peeks o products in the upcoming January – June 2021 Mini Catalog and Sale-A-Bration. Get your list ready for the Giant Year-End Closeout beginning Tuesday, December 8th.

    If you need any stamping supplies, I’d be very happy to be your Demonstrator.  If you want more information on being a discount shopper or part of our team, drop me a line at stampdabbles@gmail.com. I’d love to hear from you.

    Happy Stamp Dabbling!

    stampdabbles@gmail.com
    • Visit my online store here.
    • The current Host Code is M7KHZWE4
    • Shop the Clearance Rack here.
    • Reserve a Paper Pumpkin Subscription here.
    • New to Stamping? Check out the new Beginner’s Brochure here.
    • Earn FREE Stampin’ Up! Products – See Customer Rewards here. It’s my way to say thank you!
    • In addition to my online store, I also take PayPal payments for orders. See the bottom of the Customer Rewards page here for details.
    Product List

    The Quite Curvy Variety Bundle (which includes Curvy Christmas and Classic Christmas DSP) will be available November 3, 2020 through January 4, 2021. The Quite Curvy Bundle will be available in the January – June 2021 Catalog. View a printable flyer with the details HERE.


    August-December 2020 Mini Catalog

    You will find many wonderful, beautiful, creative and fun ideas and products inside. You can check it out digitally HERE. If you do not already have a Demonstrator that you personally work with, drop me a request with your address at stampdabbles@gmail.com and I will be glad to mail you one along with a handmade card and a printed Wish List.


    2020-21 Stampin’ Up! Annual Catalog

    You can check it out digitally HERE

    Ordering

    Once you have found the thing(s) in the catalog that you love and just have to have. You can order them by clicking the cute Market Shop photo in the Sidebar (or HERE). If you need some help in putting together a design or knowing what products you need to put together with your stamps, I would love to help. Just drop me a quick note at stampdabbles@gmail.com and we’ll go from there. We can follow up with a phone call, a Zoom “face-to-face”, email or text….whatever works for you. 

    You will also receive $10 in product credit for every $50 you spend when you use the monthly Host Code at the bottom of my posts…the current Host Code is M7KHZWE4. (If your order is $150 or more, you will receive your own code which includes my reward as well as additional rewards from Stampin’ Up! – see the Rewards Tab for details). You will also receive loyalty points which will translate into more free product. You can find a Loyalty Order Tracking Form HERE to help you keep track.